Year-Round Greens: How to Grow Microgreens Indoors
November 24, 2024
Growing microgreens indoors transforms even the smallest corner of your home into a green powerhouse, even in the dead of winter! Microgreens are the tiny seedlings of leafy greens, and they pack a big punch in energy, nutrients, and—most importantly—flavor. They’re easy to grow, thrive right on your kitchen counter, and add a burst of freshness to your meals. In this guide, we’ll cover everything from choosing seeds to harvesting and enjoying your greens.
Why Grow Microgreens?
Growing your own microgreens comes with many benefits: saving money on groceries, boosting your energy levels, enjoying fresh, organic greens right through the winter, and more! Not only are homegrown microgreens the freshest produce you can get—especially in winter—but studies also show that microgreens contain up to 40 times the nutrient levels of their fully-grown counterparts. The best part is that you can grow them yourself year-round, right inside your home!
Choosing Your Seeds
The world of microgreens is a tasty adventure just waiting to be explored! Here are a few popular varieties to start you off on:
- Broccoli: With a crunchy texture and a slight peppery bite, broccoli microgreens add a fresh kick to any dish. These greens are loaded with vitamins C and K and sulforaphane, a powerful antioxidant that supports cellular health.
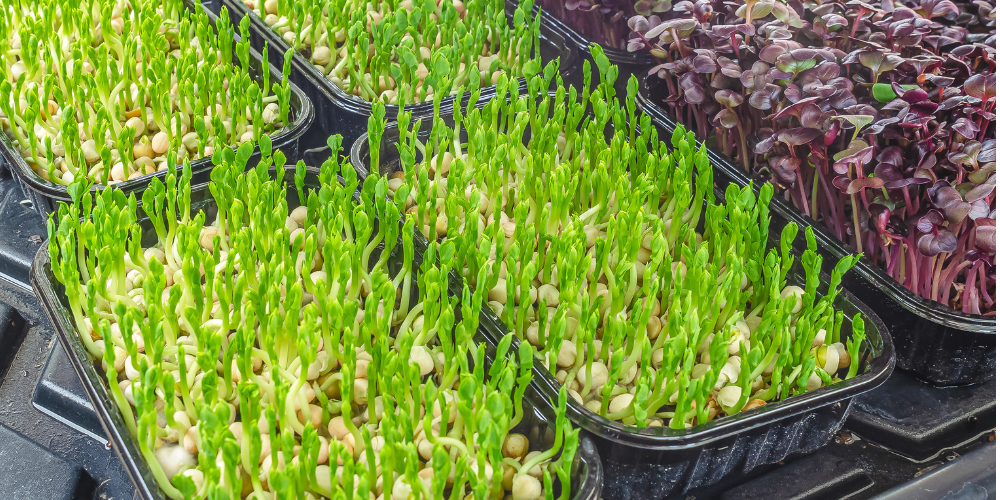
- Radish: Radish microgreens bring a bold, spicy punch and vibrant colors like pink and purple to your winter dishes, making them a favorite for both flavor and visual appeal. They’re also rich in immune-boosting vitamins A and C, adding a healthy twist to tacos, salads, and sandwiches.
- Kale: Kale microgreens are mild, slightly nutty, and low-maintenance, making them a perfect choice for new growers. High in vitamins A, C, and K, they’re a tasty way to add nutrition to smoothies and salads.
- Sunflower: With a sweet, nutty taste, sunflower microgreens are perfect for snacking on their own or adding to salads. They’re rich in amino acids, B vitamins, and zinc, which support immune health and boost energy.
- Pea Shoots: These microgreens have a light, fresh taste similar to garden peas, and they’re full of vitamins A, C, and folate. Their delicate flavor and crisp texture make them ideal for salads, stir-fries, and soups.
- Chard: Chard microgreens bring an earthy, beet-like sweetness to your meals and come in vibrant reds and greens, adding color and nutrition to any dish. Packed with vitamins A, C, and E, they offer antioxidants that support eye health and skin vitality.
Setting Up Your Microgreen Garden
Setting up a microgreen garden is as simple as it gets! Here’s what you’ll need:
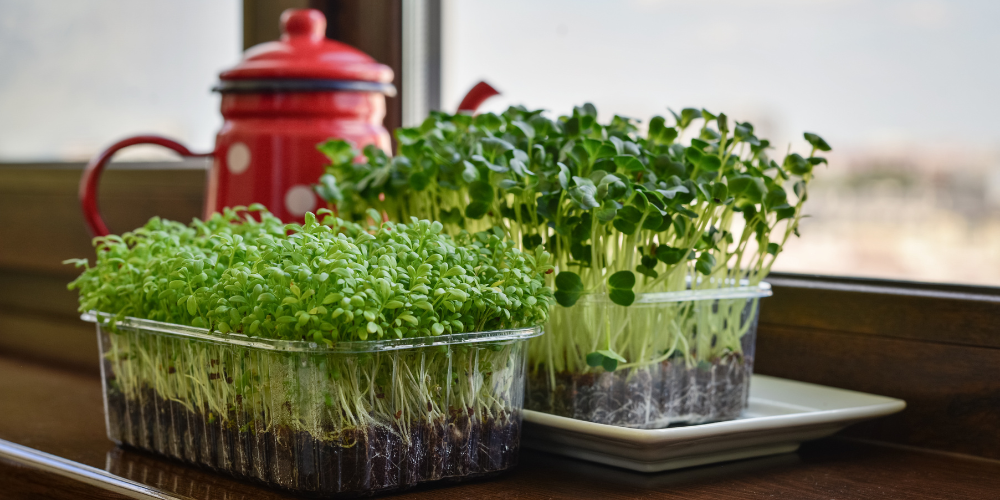
- Container: You can grow microgreens in shallow trays, old takeout containers, or dedicated seed-starting trays. Just remember to put a few holes in the bottom of your chosen container if it doesn’t come pre-punched.
- Soil: Use a light, airy potting mix or a soil-free medium designed for indoor gardening.
- Light: Microgreens need plenty of light, so we recommend placing them on a sunny windowsill. If your windows get limited sunlight or are drafty through the winter, use a grow light to give them the sun-like sustenance they’ll need to thrive.
Creating an indoor mini-garden is a small yet fantastic way to brighten up your kitchen that can quickly become a DIY indoor forest! Place your garden where you’ll see it daily, such as near a window or on your kitchen counter. Not only will it get enough light in these locations, but it will also become the focal point of your kitchen.
How to Grow Microgreens
After you set up your containers, follow these simple steps to grow your microgreens to their fullest potential:
- Sow Seeds: Sprinkle seeds evenly across damp soil, aiming for a dense layer that isn’t too crowded. Lightly press the seeds into the soil with your fingers or a small piece of cardboard for good seed-to-soil contact.
- Watering: Like new seeds in your garden, microgreens like to be kept consistently moist but not soaked. Gently mist them with a spray bottle once or twice daily, depending on your kitchen’s conditions. Be careful not to overwater, which can lead to mold.
- Temperature: These little greens are hardy, but they prefer a room temperature of around 60-70°F.
- Troubleshooting: If your greens start looking a bit leggy (tall and thin), they may need more light. If this occurs, move them closer to a window or use a grow light to get them back to looking lush and vibrant.
As you go along, you might encounter little hiccups like mold, a common issue if there’s too much moisture or not enough airflow. If mold appears, reduce watering slightly and increase ventilation. With just a bit of attention, you’ll be amazed at how fast these little greens grow!

The Best Time for Harvesting Your Greens
After about 1-2 weeks, your microgreens will be ready for harvest! The best time to cut them is once they reach 2-3 inches tall and have developed their first set of true leaves. Simply snip them with scissors right above the soil line, rinse gently, and they’re ready to eat!
How to Enjoy Your Microgreens: Key Recipes
Microgreens make a tasty addition to many dishes, from sandwiches to smoothies. These super greens are superb when sprinkled on top of scrambled eggs, tossed into garden salads, or blended into nutrient-packed drinks. For something creative, try these quick microgreen-inspired recipes:
Microgreen Avocado Toast
Top a slice of toast with smashed avocado, a squeeze of lemon juice, and a sprinkle of salt and pepper. Pile on your favorite microgreens, like radish or broccoli for a fresh kick, and finish with a drizzle of olive oil.
Microgreen Pesto
Blend a cup of microgreens—like basil, sunflower, or arugula—with garlic, a generous handful of your favorite nuts, Parmesan, and olive oil. Toss it with pasta, spread it on a sandwich, or use it as a dip!
Growing microgreens indoors is a delightful way to keep your green thumb active all year while enjoying fresh veggies within arm’s reach. With a little effort, you can enjoy these nutrient-packed greens from your own kitchen garden, no matter the season. So set up your mini-garden and experience the fresh flavor of microgreens yourself! There’s no better way to keep things green and vibrant in your indoor Glenside garden, even as snow falls outside!